RackStand Installation Instructions
Installation Instructions
STEP 1: Attach RackStand to the Axle.
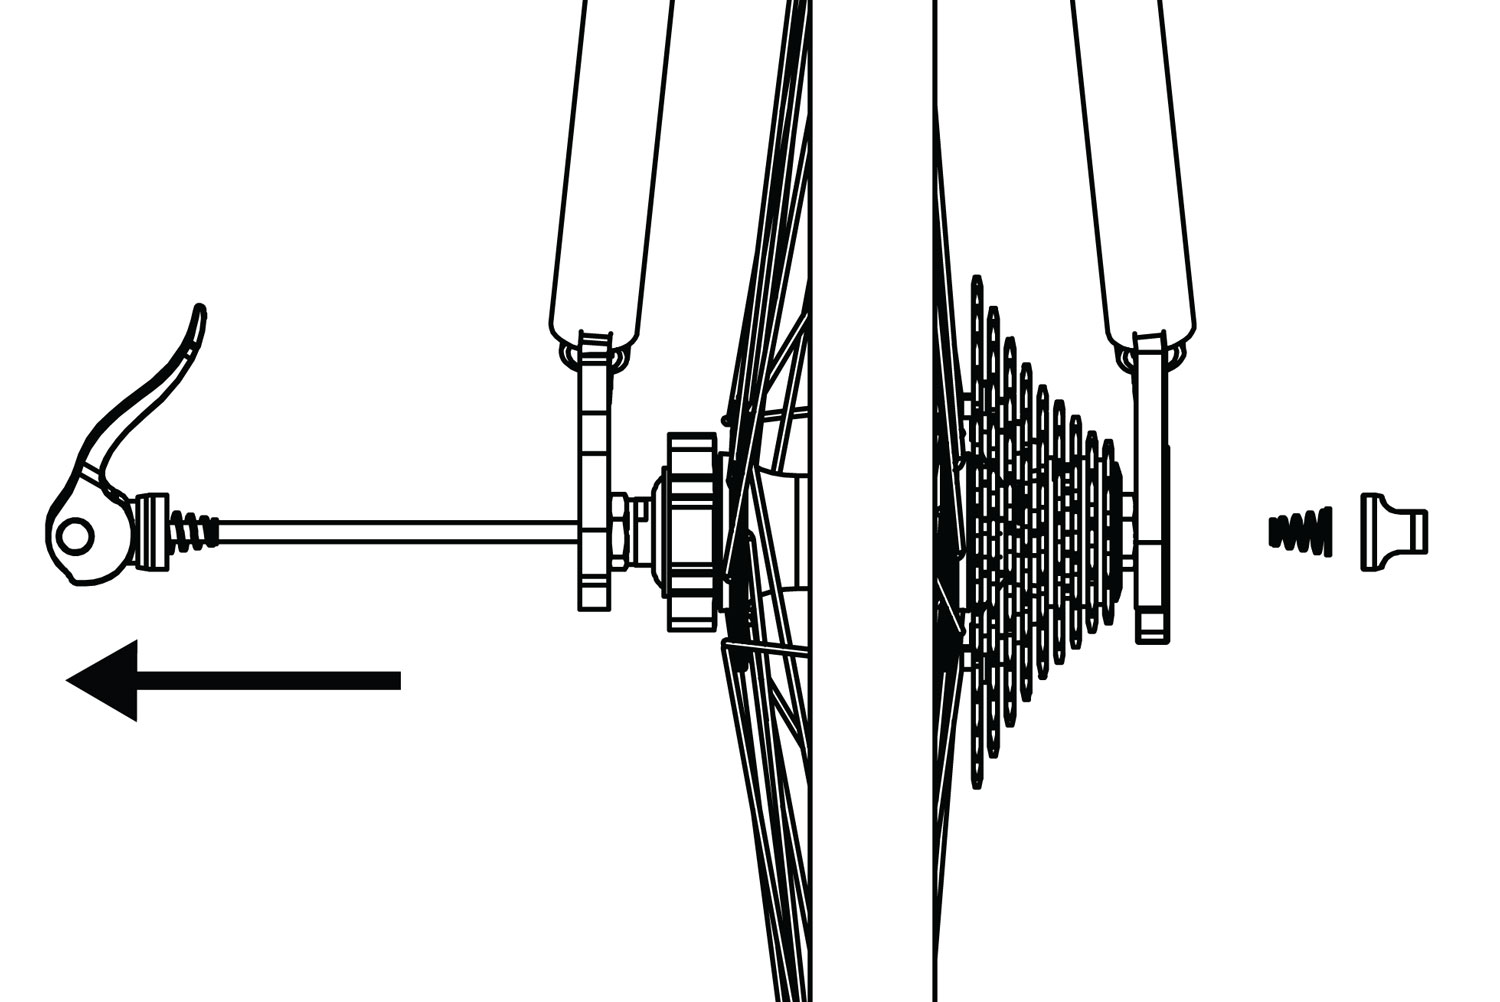
Remove existing rear wheel quick release from the bike.
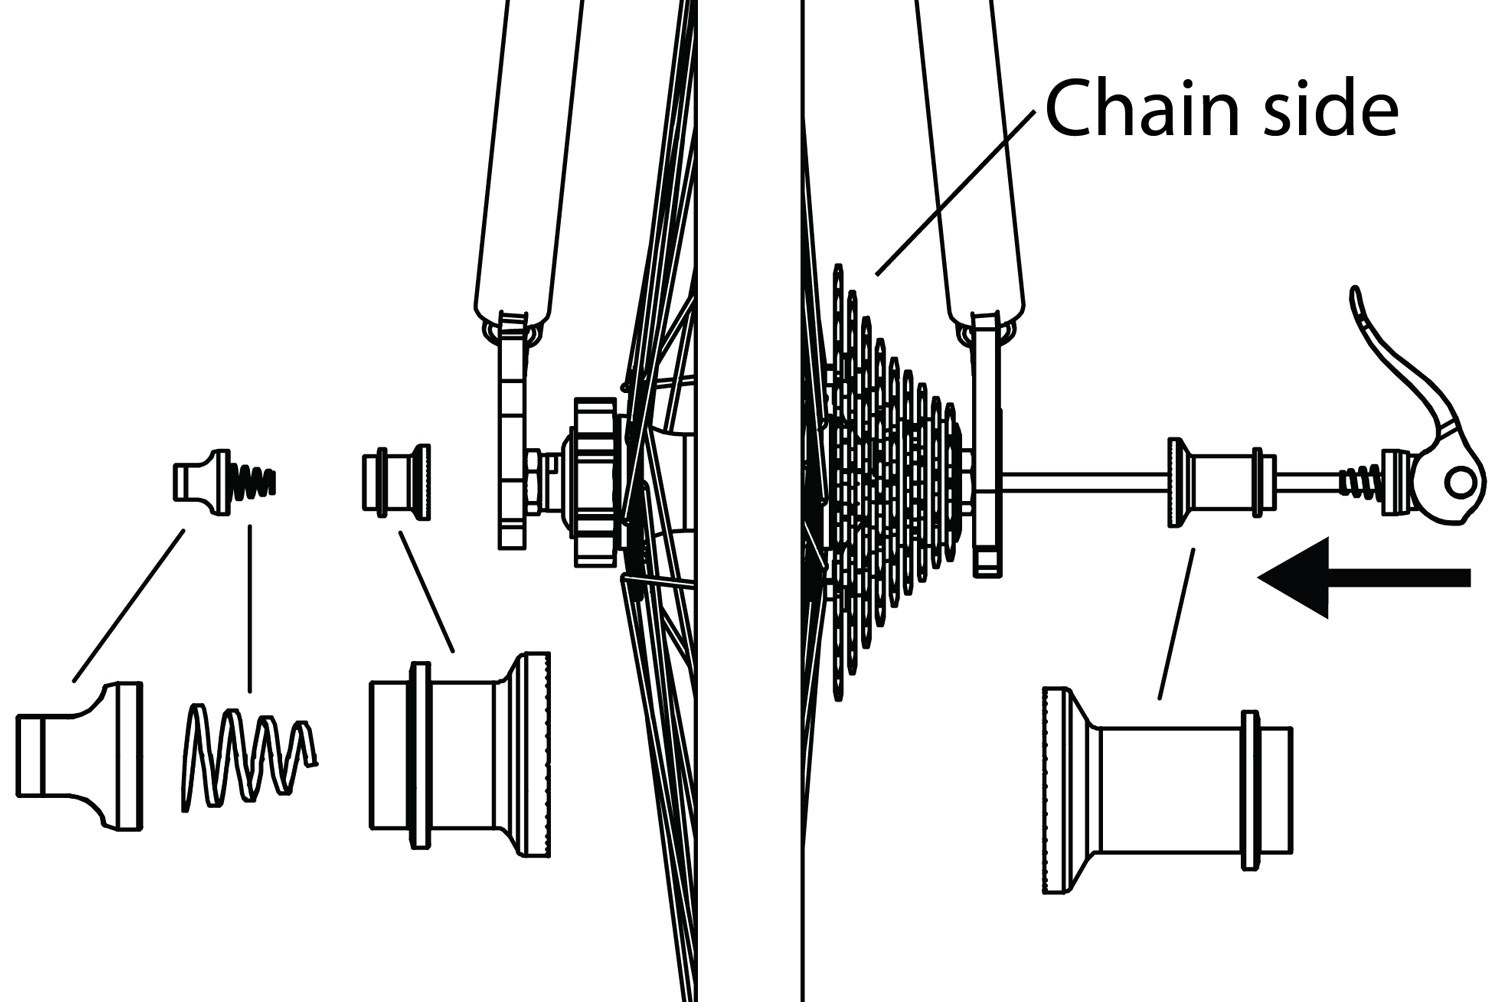
Install new RackStand quick release in the hub with the lever on the chain side of the bike (right side) and the spacers in the order shown above.

To attach the RackStand, slide the dropouts into place on the QR as shown above. The spacers should be between the rack and the bike frame.

RackStand dropouts shown above in the correct position with the spacers between the rack and the bicycle frame.

Ensure the recessed portion of the quick release spacers are seated inside the rack dropouts.

Adjust quick release to the proper tension. Open and close the lever with one hand while gradually tightening the adjusting nut with other hand. Continue tightening nut until you feel resistance on lever at the mid-point of its travel.

The quick release lever is securely closed when it leaves and imprint on the palm of your hand from moving the lever into the closed position. When closed it should be pointing toward the front of the bike as shown above.
STEP 2a: Attach latch to the seat tube.
Complete this step ONLY for 2016 or later model year Montague bikes.

If you have a 2016 or later model year Montague bike, the included latch shown above will be installed on the frame’s existing seat tube collar.

Remove the rear bolt from the latch and re-install so it passes through the opening on the back side of the frame collar. Tighten to 5 Nm.
STEP 2b: Attach latch via J-Bracket.
Complete this step for ALL other bike brands.

If you have a 2015 or earlier model year Montague bike or a bike from any other manufacturer, the included J-Bracket will be used to attach the latch to the bike.

The latch mounts to the J-Bracket with an eye-bolt as shown above. It can attach to any side of the bracket depending on the final orientation of the J-Bracket.

The J-Bracket can be attached in multiple orientations and multiple locations on the bike. Use the one that works best with your frame. One option is shown above with the J-bracket bolted to the brake bridge.

Option 2 shown above. Note: The options shown on these instruction are not the only possibilities. The J-Bracket is made to be attached in nearly any orientation.

Another option shown above.

An additional option shown above.
STEP 3: Rotate RackStand and adjust connection point.
Complete this step for installations on ALL bikes.

Rotate RackStand to the up position.

Adjust rack arms to the correct angle for latch engagement and correct length to make the rack level with the ground.

Rack arms are adjusted by loosening the bolts holding the arms to either side of the rack, sliding them to the desired position and re-tightening the bolts.

For best engagement, the arms should meet the latch on the upper half of the lever as shown above.

Push the rack forward until the arms click into place in the latch. Check to ensure the latch is fully engaged by pulling back on the rack.

Check that wheel is secure before riding. With rack in lowered position, lift the rear wheel off the ground and give the top of the tire a few sharp downward strikes. It should not wobble or come off.